| << Chapter < Page | Chapter >> Page > |
You will need:
Step 1:
Try on the old shirt to see whether it still fits you properly. If the fit is slightly tight or loose, you must bear this in mind so that you can make adjustments to the width at the seams.
Step 2:
Carefully unpick the seams of the old shirt. Place the different parts on a large sheet of newspaper and trace the outlines carefully, using a pencil. At this stage you must ensure that the shirt will fit properly. If necessary, you must use a tape measure and adjust the measurements of different parts to do so. If you should like to change the style, it must also be done at this point. You might decide to change the round neckline to a V-neckline, to have long sleeves instead of short sleeves, or to cut the shirt shorter, and so on.
Step 3:
Cut out the different pattern pieces and pin them together, using straight pins. Fit the pattern loosely around you to see how you are managing. Check whether you have made proper allowance for all the seams and hems. Is the length correct? Are the sleeves long enough? Check all aspects of the pattern. Then indicate the notches that will ensure that you fit the different pattern pieces together correctly.
Step 4:
You may now remove the pins and lay out the pattern pieces neatly on unprinted paper before tracing the final pattern. Cut out these pattern pieces.
Step 5:
Study the different pieces of a bought pattern to find out as much as you can about the information that is given on the different pattern pieces. Try to transfer the most important information to your own pattern pieces, e.g.:
Step 6:
Fabric is usually sold in 3 approximate widths: 900 mm; 1 150 mm or 1 500 mm. Join newspapers together to obtain these widths and lay your pattern pieces out on these to try to work out approximately how much fabric you will need for your garment.
Step 7:
Get suitable cloth for your garment. (You need not use expensive fabric).
Lay out the pattern pieces on the fabric according to the necessary specifications and pin them to the fabric. (It is important to work on a clean, smooth surface that is large enough).
Cut out the pattern, using a sharp pair of scissors. Work with care to ensure that you indicate all the notches clearly. Try to keep your cutting line straight, with long even cuts. Do not unpin the pattern from the fabric, or you might have difficulty in recognising the different parts afterwards.
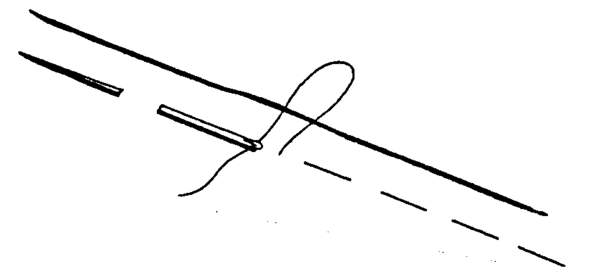
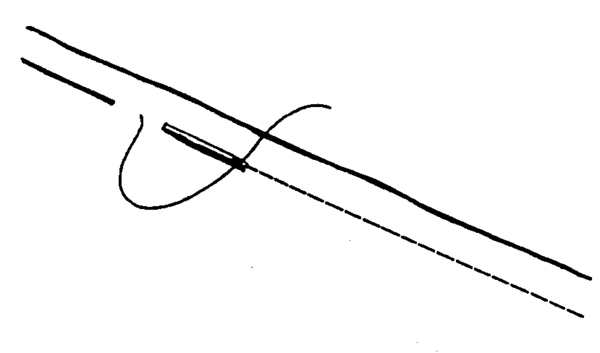
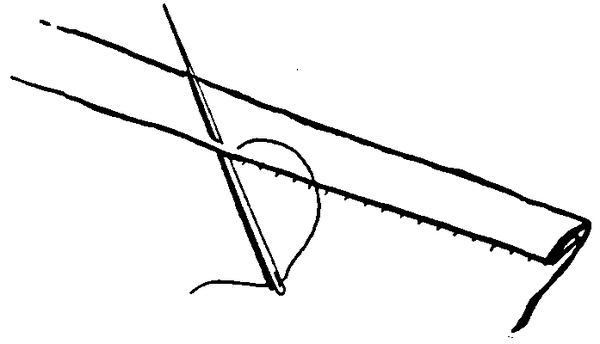
Do not become discouraged if you do not know how to use a sewing machine, or do not have one available. You can manage equally well with a needle and tread.
Study the sketches below to learn more about the basic stitches that you will need for seams and hems. Practise sewing them on a piece of fabric.


What do you need?
Do the work as follows:
Neatly sew down the facing around the neckline, using hemstitch. Iron the whole garment , if necessary.
You may now try on the shirt to see what it looks like. If it is a loose-fitting T-shirt, seams that aren't perfectly straight will not be too noticeable.
Next, you can organise a competition to design a suitable emblem for grade seven and paint it on your shirts, using fabric paint. By doing this, you will be creating a garment that will always remain unique and remind you of your grade seven year.
Next, you as a class must, under leadership of you educator, establish a set of criteria that you could apply to evaluate your final product, which, in this case, is the T-shirt. Make use of factors such as the following:
Set up a standard table according to which each item (shirt) that was made can be evaluated and choose a winning T-shirt.
| Learning Outcomes(LOs) |
| LO 1 |
| TECHNOLOGICAL PROCESSES AND SKILLSThe learner will be able to apply technological processes and skills ethically and responsibly using appropriate information and communication technologies. |
| Assessment Standards(ASs) |
| We know this when the learner: |
| Investigates :1.1 investigates the background context, the nature of the need, the environmental situation, and the people concerned when given a problem, need or opportunity set in a local context; |
| Evaluates :1.12 evaluates the product or system based on criteria linked directly to the design brief and some of the specifications and constraints, and suggests improvements or modifications. |

Notification Switch
Would you like to follow the 'Technology grade 7' conversation and receive update notifications?