| << Chapter < Page | Chapter >> Page > |
Good day! We hope you will enjoy the following programme. You will view houses and buildings differently after this!
Your educator will help you to do the following:
STEP 1
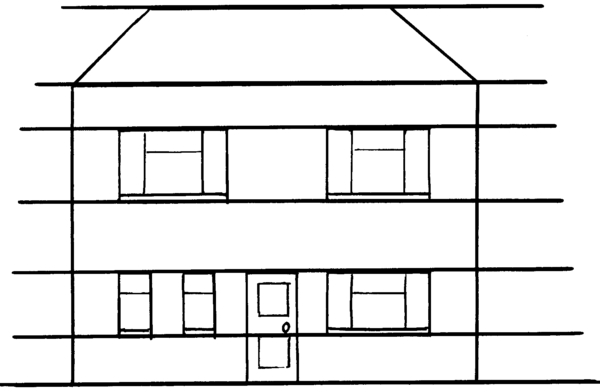
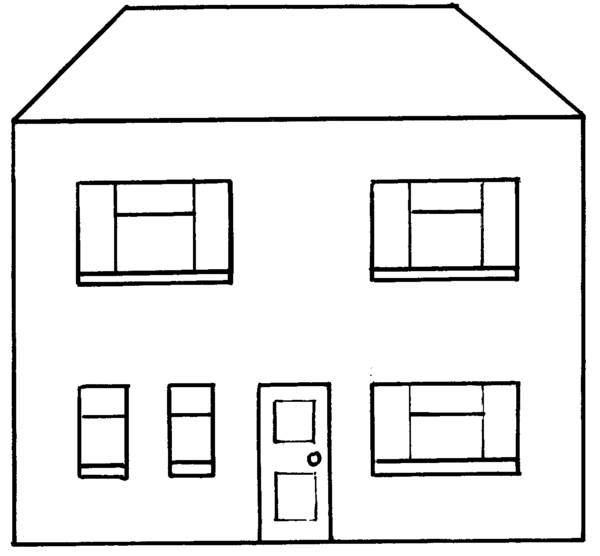
First, look at all the parallel lines in the classroom. For instance, look at all the top and bottom sections of the door and the windows. The lines where the wall meets the ceiling and floor are also parallel. This means that the distance between the ceiling and the floor at the one end of the wall is the same as the distance at the other end. Look at the picture of a building below and then draw lines with a ruler on the ground, the bottom and top edges of the door(s) and window(s), the bottom edge of the roof and the top part of the roof.
STEP 2
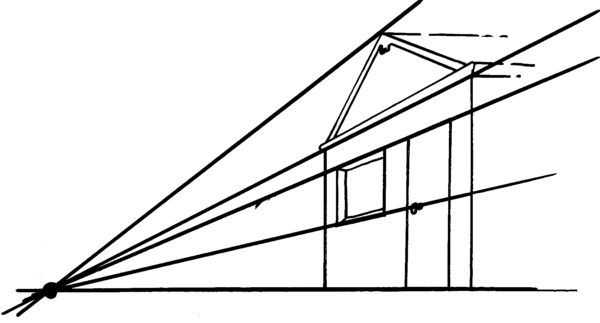
Find a photograph of a house or a building that is seen from an oblique angle. A good place to look is in the home guide of a newspaper or in a property agent’s brochure. Paste the photo onto a sheet of paper. Draw the same lines as in Step 1, but draw the lines past the end of the house or building. What happens to the lines? Extend the lines now until they join up at one point. It could possibly happen outside the paper.
STEP 3
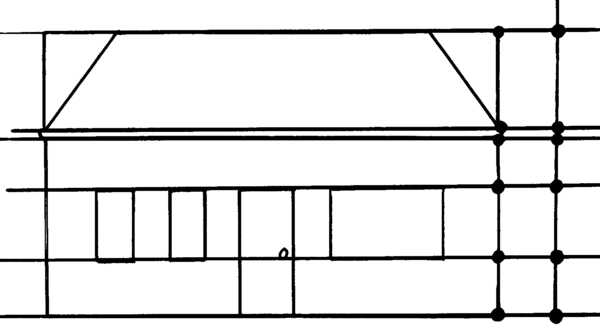
First, draw the front of a building. Then draw horizontal and parallel lines through the following parts of the house: the top of the roof, the bottom edge of the roof, the top and bottom edges of the windows and door(s) and the bottom of the wall on the ground. The drawing may be done in line only. Now draw a vertical line at the side of the house and place a dot in each spot where the horizontal lines cross the vertical line.
STEP 4
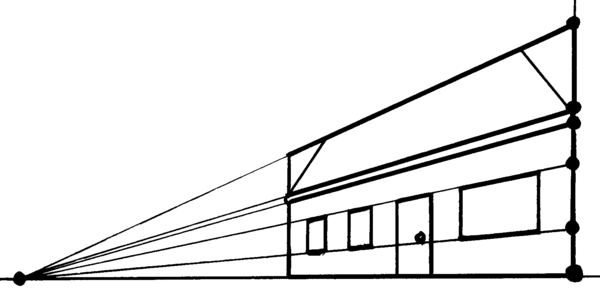
On the right side of another page, copy the vertical line with the dots that you drew in the previous step. Then draw a horizontal ground-line across the page at the bottom page, where the lowest dot is. On the left of the page, make a dot on the ground-line. This dot on the left-hand side must then be joined by means of soft pencil lines with the dots on the vertical line. The rest of the house can be drawn afterwards by means of vertical lines. This method can be repeated to create a number of adjoining houses, or even a whole row of houses in a street.
Step 1
Draw a horizontal line almost at the bottom of the page that has been turned crosswise (i.e. “landscape”). Make a dot more or less in the centre of that line. Repeat the process that was done in Step 4 of the previous activity, on both sides of the paper in order to create a street scene. In the background you can draw the sky with clouds, mountains or trees to complete the scene. Then you must paste corrugated board over parts of the houses along the front of your drawing, closest to you. Finally, you can use pastels, crayons, paint or a combination of these to add some colour to the picture.
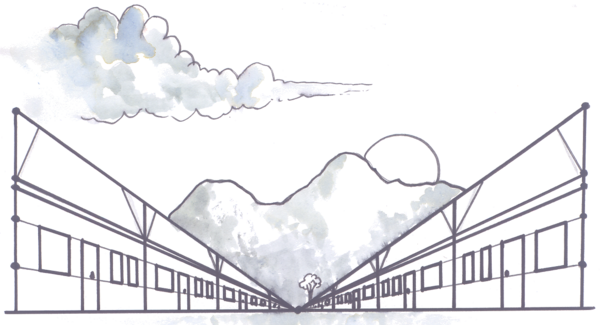
Remember that warm colours come to the foreground and cold colours move back. Therefore, use the warmer colours in front and the cold colours towards the back to emphasise the feeling of distance even more.
On a larger scale, this street scene could be used as backdrop for a puppet theatre or, on a very large scale, as the backdrop for a theatre production.
| Learning Outcomes(LOs) |
| LO 1 |
| CREATING, INTERPRETING AND PRESENTING The learner will be able to create, interpret and present work in each of the art forms. |
| Assessment Standards(ASs) |
| We know this when the learner: |
| VISUAL ARTS |
| 1.7 transforms visual information into structured compositions based on individually selected, real or imagined situations in South Africa , using available materials and appropriate techniques in both two-dimensional and three- dimensional work. |

Notification Switch
Would you like to follow the 'Arts and culture grade 6' conversation and receive update notifications?