| << Chapter < Page | Chapter >> Page > |
An element's electron configuration can be represented using Aufbau diagrams or energy level diagrams. An Aufbau diagram uses arrows to represent electrons. You can use the following steps to help you to draw an Aufbau diagram:
An Aufbau diagram for the element Lithium is shown in [link] .

A special type of notation is used to show an atom's electron configuration. The notation describes the energy levels, orbitals and the number of electrons in each. For example, the electron configuration of lithium is 1s 2s . The number and letter describe the energy level and orbital and the number above the orbital shows how many electrons are in that orbital.
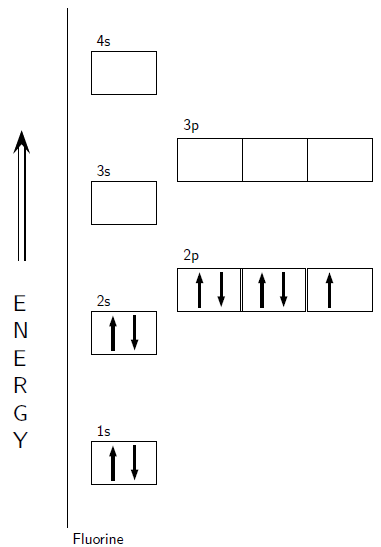
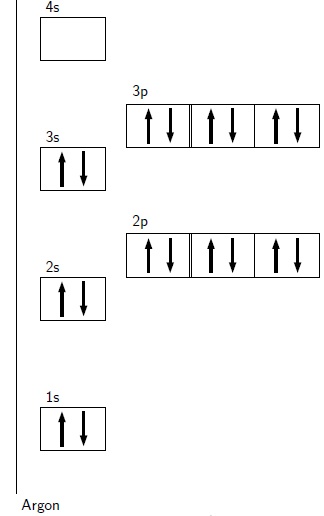
Aufbau diagrams for the elements fluorine and argon are shown in [link] and [link] respectively. Using standard notation, the electron configuration of fluorine is 1s 2s 2p and the electron configuration of argon is 1s 2s 2p 3s 3p .


Electrons in the outermost energy level of an atom are called valence electrons . The electrons that are in the energy shells closer to the nucleus are called core electrons . Core electrons are all the electrons in an atom, excluding the valence electrons. An element that has its valence energy level full is more stable and less likely to react than other elements with a valence energy level that is not full.
The electrons in the outer energy level of an atom
All the electrons in an atom, excluding the valence electrons
By this stage, you may well be wondering why it is important for you to understand how electrons are arranged around the nucleus of an atom. Remember that during chemical reactions, when atoms come into contact with one another, it is the electrons of these atoms that will interact first. More specifically, it is the valence electrons of the atoms that will determine how they react with one another.
To take this a step further, an atom is at its most stable (and therefore unreactive ) when all its orbitals are full. On the other hand, an atom is least stable (and therefore most reactive ) when its valence electron orbitals are not full. This will make more sense when we go on to look at chemical bonding in a later chapter. To put it simply, the valence electrons are largely responsible for an element's chemical behaviour and elements that have the same number of valence electrons often have similar chemical properties.
One final point to note about electron configurations is stability. Which configurations are stable and which are not? Very simply, the most stable configurations are the ones that have full energy levels. These configurations occur in the noble gases. The noble gases are very stable elements that do not react easily (if at all) with any other elements. This is due to the full energy levels. All elements would like to reach the most stable electron configurations, i.e. all elements want to be noble gases.
| Element | No. of energy levels | No. of core electrons | No. of valence electrons | Electron configuration (standard notation) |
| Mg | ||||
| K | ||||
| S | ||||
| Ne | ||||
| N |
Earlier in this chapter, we talked about different 'models' of the atom. In science, one of the uses of models is that they can help us to understand the structure of something that we can't see. In the case of the atom, models help us to build a picture in our heads of what the atom looks like.
Models are often simplified. The small toy cars that you may have played with as a child are models. They give you a good idea of what a real car looks like, but they are much smaller and much simpler. A model cannot always be absolutely accurate and it is important that we realise this so that we don't build up a false idea about something.
In groups of 4-5, you are going to build a model of an atom. Before you start, think about these questions:
As a group, share your ideas and then plan how you will build your model. Once you have built your model, discuss the following questions:
Now look at what other groups have done. Discuss the same questions for each of the models you see and record your answers.
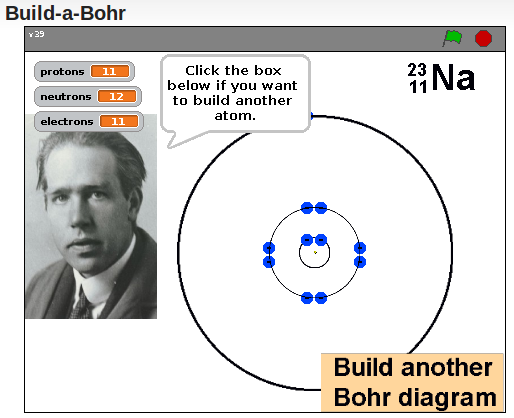
The following simulation allows you to build an atom
run demo

This is another simulation that allows you to build an atom. This simulation also provides a summary of what you have learnt so far.
Run demo


Notification Switch
Would you like to follow the 'Siyavula textbooks: grade 10 physical science' conversation and receive update notifications?