| << Chapter < Page | Chapter >> Page > |
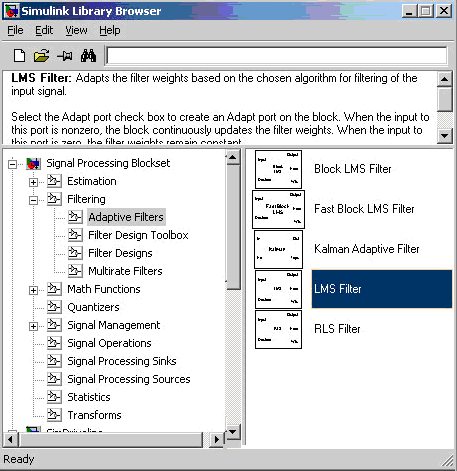
Select View ->Library Browser ->Signal Processing Blockset ->Filtering->Adaptive Filters.
Highlight “Adaptive Filters”. Drag-and-drop the “LMS Filter” block onto the model.
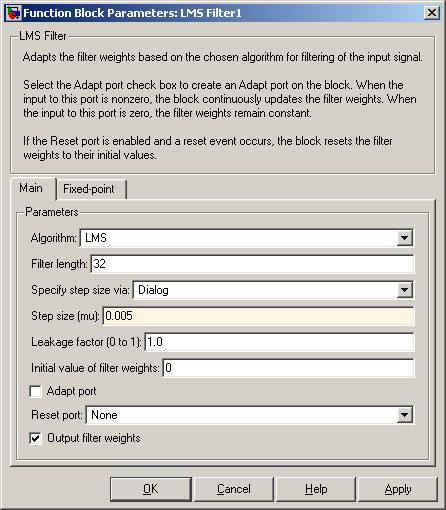
The most critical variable in an LMS filter is the “Step size (mu)”.
If “mu” is too small, the filter has very fine resolution, but reacts too slowly to the audio signal.
If “mu” is too great, the filter reacts very quickly, but the error also remains large.
We will start with 0.005.
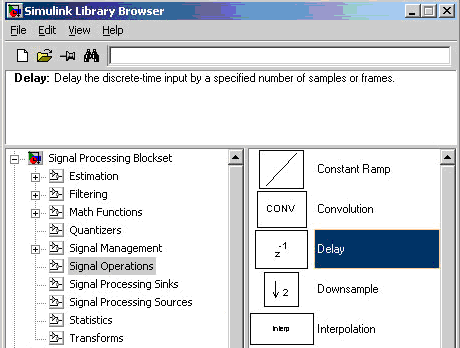
From the “Signal Processing Blockset”, highlight “Signal Operations”. Drag-and-drop the “Delay” Since we are working with frames, the delay from “Discrete Components” library will not work! block onto the model.
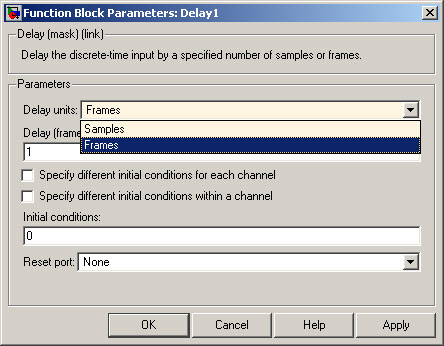
Because we are working with frames of 64 samples, it is convenient configure the delay using frames. Double-click on the “Delay” block.
Change the “Delay units” to Frames.
Set the “Delay (frames)” to 1. This makes the delay 64 samples.
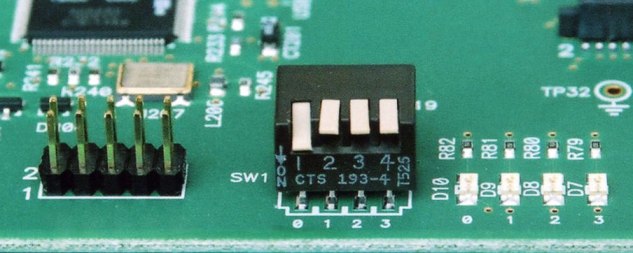
So we can hear the difference without LMS denoising and with LMS noise reduction, we will use a DIP switch of the DSK6713.
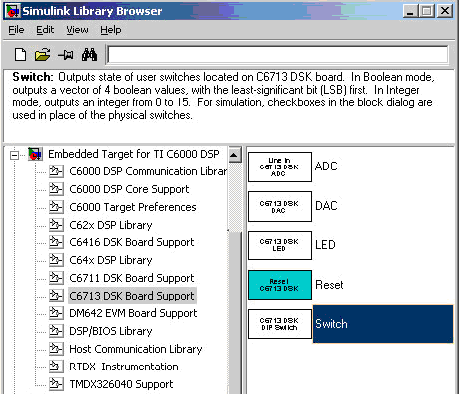
Select View ->Library Browser ->Embedded Target for TI C6000 DSP. Highlight “DSK6713 Board Support”.
Drag-and-drop the “Switch” block onto the model. Also drag-and-drop the “LED” block onto the model.
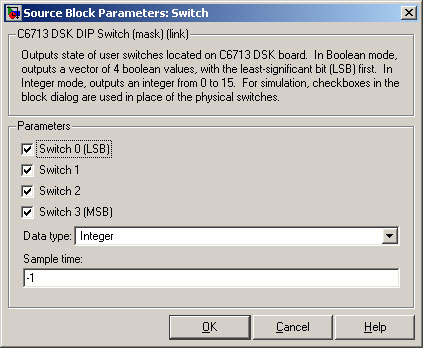
The DIP switch needs to be configured. Double-click on the “Switch” block.
Select all the boxes and set “Data type” to Integer. The “Sample time” should also be set to “–1”.
We now need to setup a way to switch between straight through without noise reduction and with LMS noise reduction.
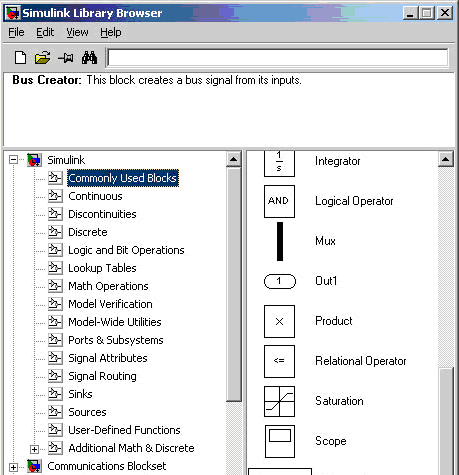
Select View ->Library Browser ->Simulink. Highlight “Commonly Used Blocks”.
Drag-and-drop a “Constant” onto the model.
Drag-and-drop a “Switch” block onto the model.
Drag-and-drop a “Relational Operator” block onto the model.
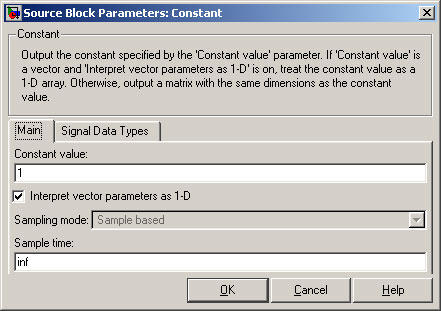
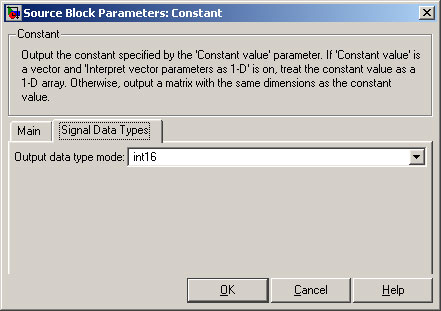
The switch values lie between 0 and 15. We will use switch values 0 and 1. Double-click on the “Constant” block. Set the “Constant value” to 1 and the “Sample time” to “inf”.
Click on the “Signal Data Types” tab. Set the “Output data type mode” to “int16”. This is compatible with the DAC on the DSK6713.
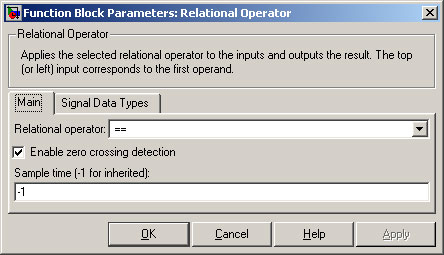
Double click on the “Relational Operator” block. Change the “Relational operator” to “==”. Click on the “Signal Data Types” tab.
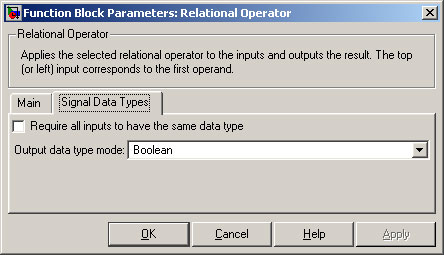
Set the “Output data type mode” to “Boolean”. Click on “OK”.
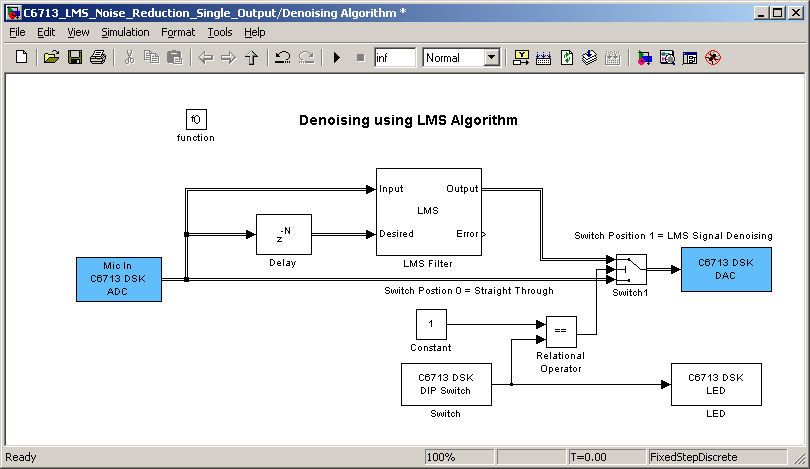
Move the blocks and join them as shown in the Figure below.
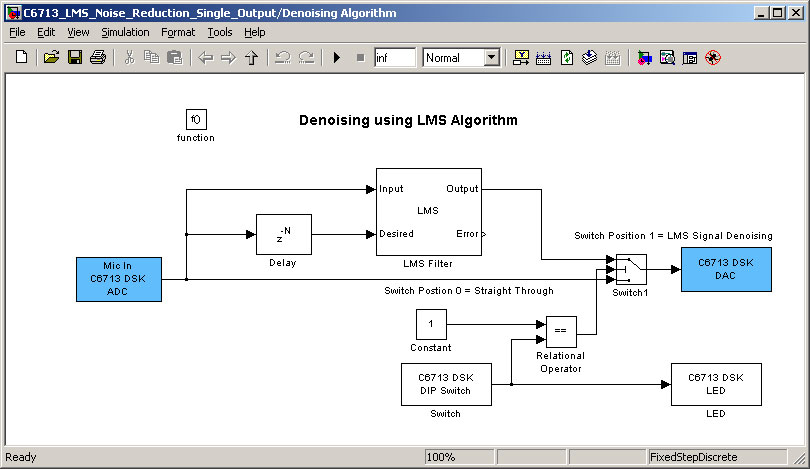
From the Toolbar, select the “Up Arrow” icon. This returns you to the next higher level.

Select Tools ->Real-Time Workshop ->Build Model.
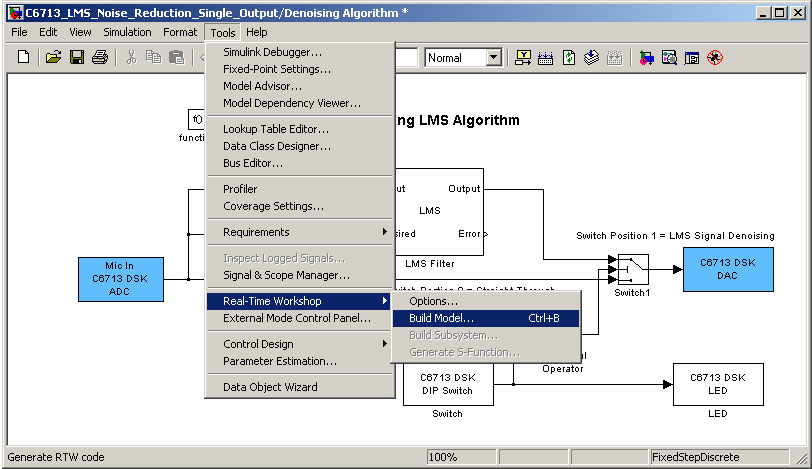
When built, the single lines are replaced by double lines. This shows frames.
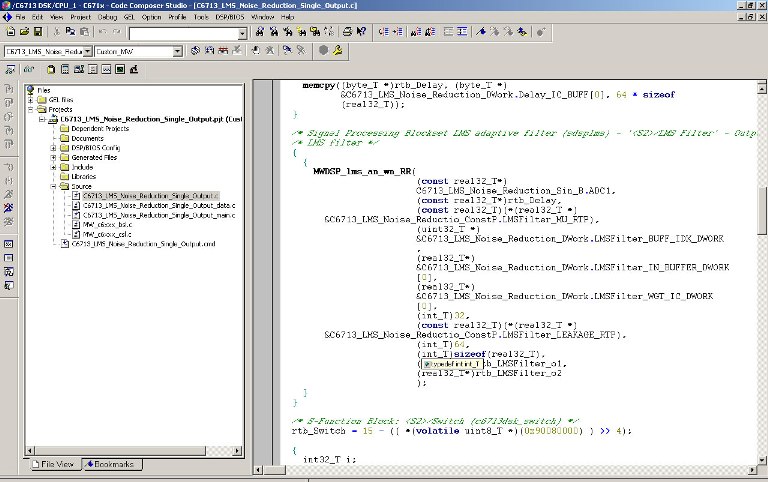
From the folders on the left, select the source code for the project.
To check out the microphone and loudspeakers, set the DIP switches on the DSK6713 as follows:
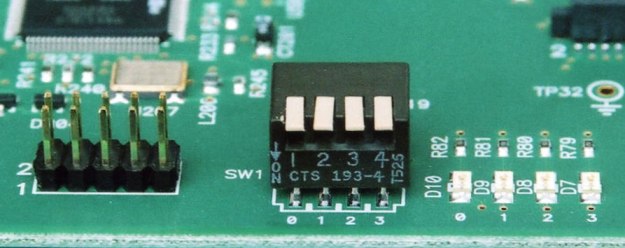
The microphone is fed directly to the loudspeakers. There is no LMS noise reduction.
To run the “LMS Noise Reduction” subsystem, set the DIP switch to 1.
You may wish to experiment with different settings. Here are some suggestions.
Change the value of “Step size (mu)” between 0.0001 and 0.5. This is the critical value.
Low values of mu give good resolution, but a slow reaction time.
High values of mu give less resolution, but faster reaction times.
Find the best value of mu for noise reduction on the TI DSK6713.
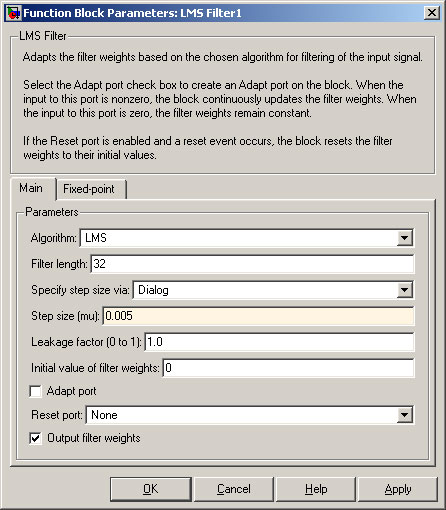
Try different value of “Filter Length”. What is the minimum value that will allow the filter to work correctly?
Inside the “Adaptive Filters” are different LMS types. Which are suitable for LMS denoising and which are not?
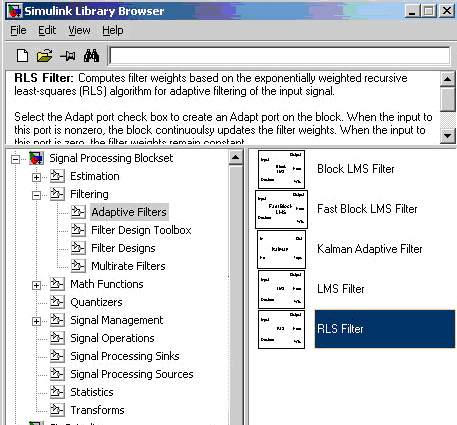
Figure 40 –
MATLAB and Simulink are registered trademarks of The MathWorks, Inc. See www.mathworks.com/trademarks for a list of additional trademarks. Other product or brand names may be trademarks or registered trademarks of their respective holders.

Notification Switch
Would you like to follow the 'From matlab and simulink to real-time with ti dsp's' conversation and receive update notifications?